ESPHome入门安装
逸山 2022/6/12 ESPHome
ESPHome是一款流行的IOT设备平台,支持ESP8266、ESP32等板。恰好之前购入一款已经无法使用的IOT设备,上面正好是ESP8266版本,最近刚好在上面安装ESPHome,本文记录安装过程,如果能给大家带来帮助就更好了。
# 设备介绍
本次设备为之前购入欧普出品的IOT设备,不知何故厂商已经提供服务了,设备上有ESP8266无线小板及一枚STM32单片机,提供红外发射、接收以及433/315射频信号,如下照片。
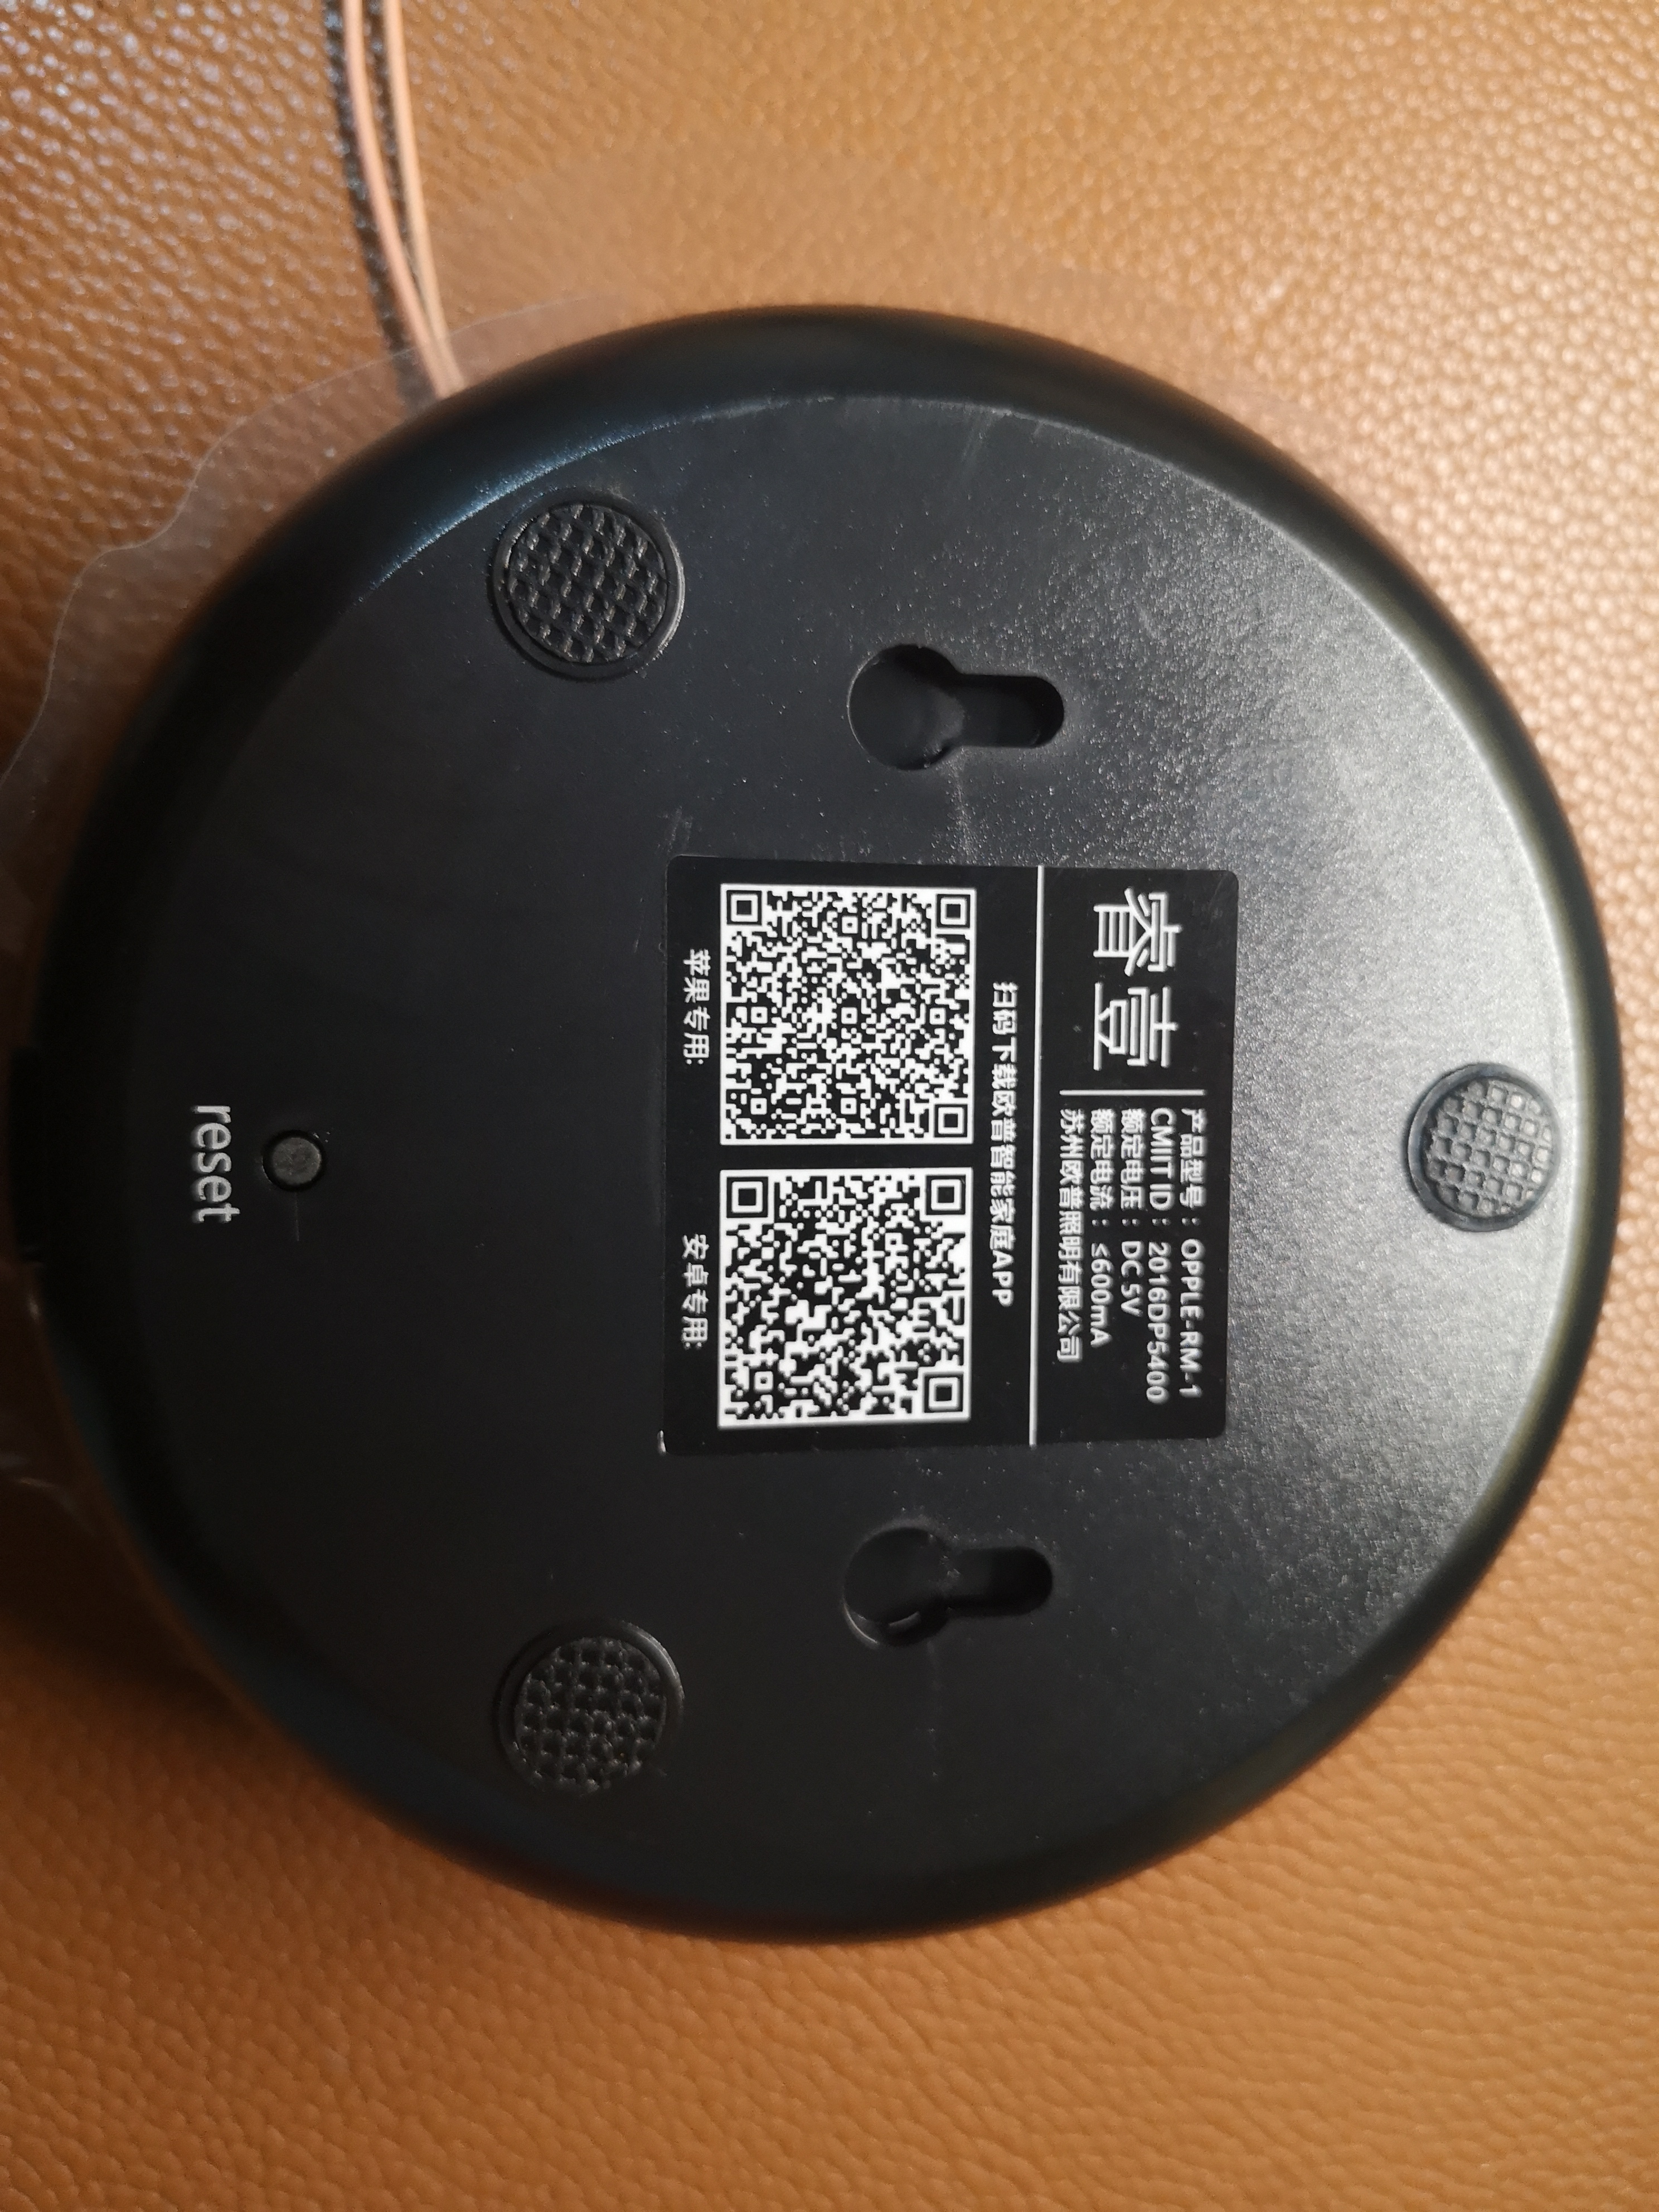
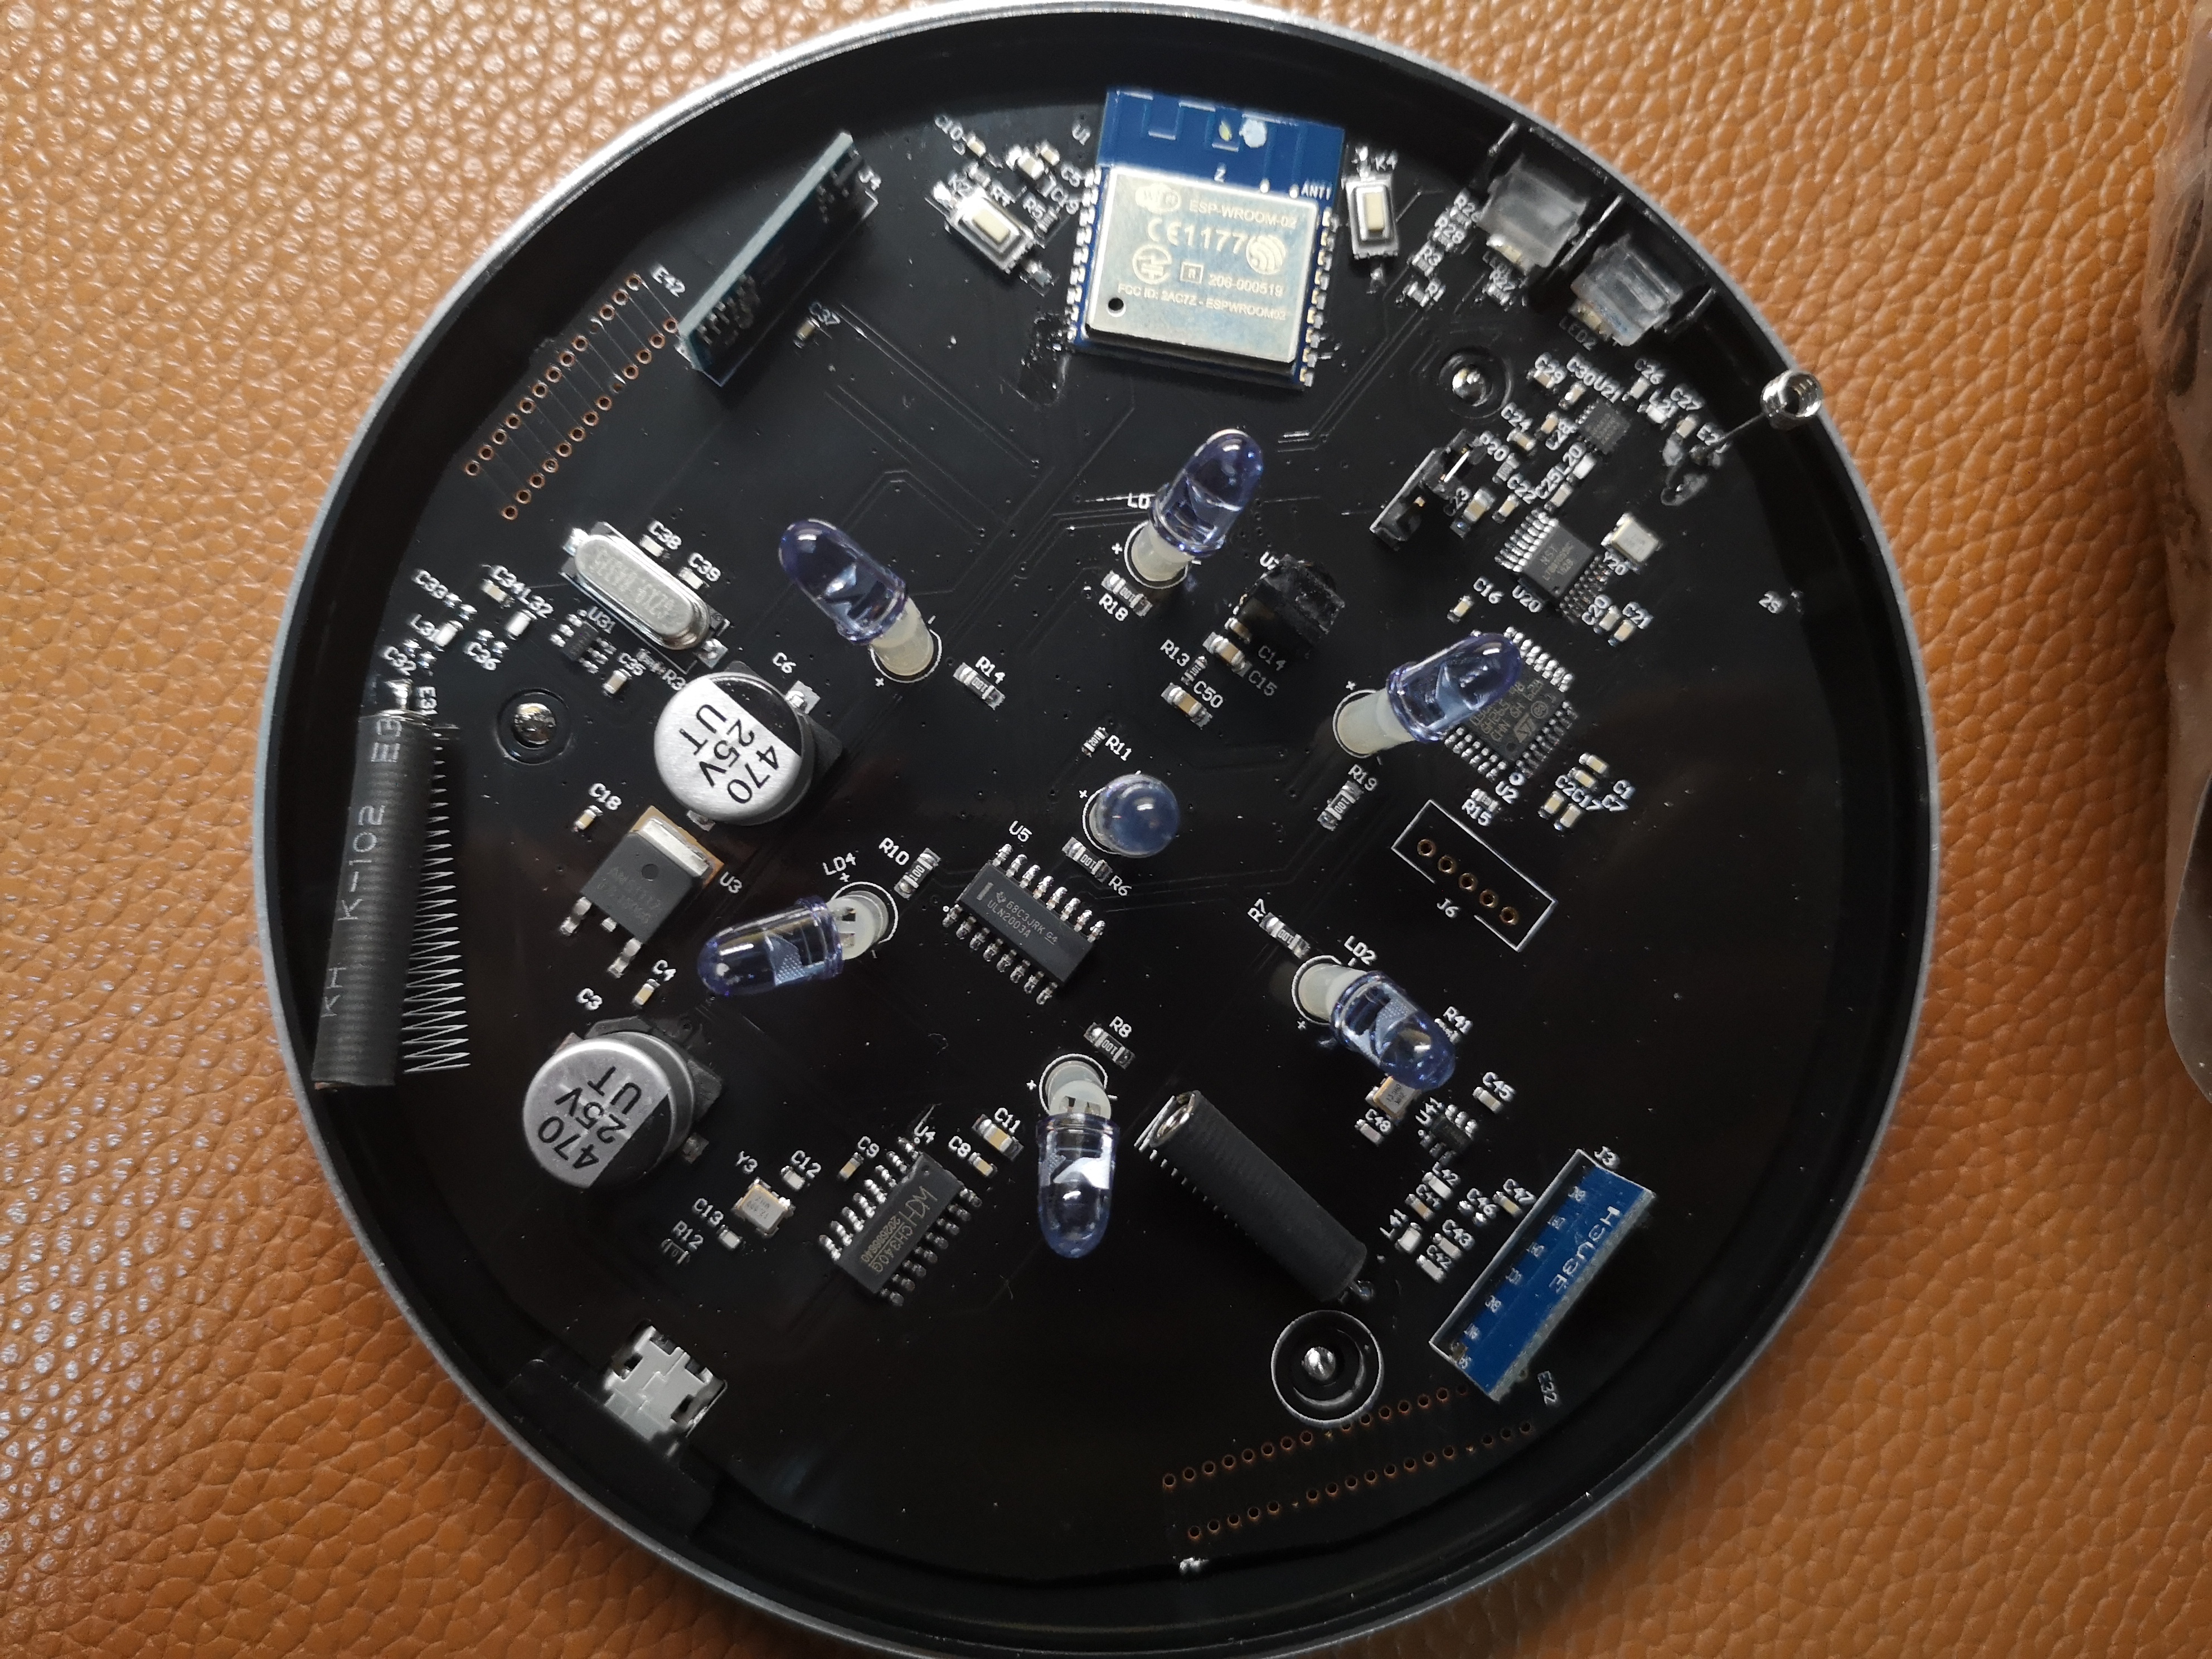
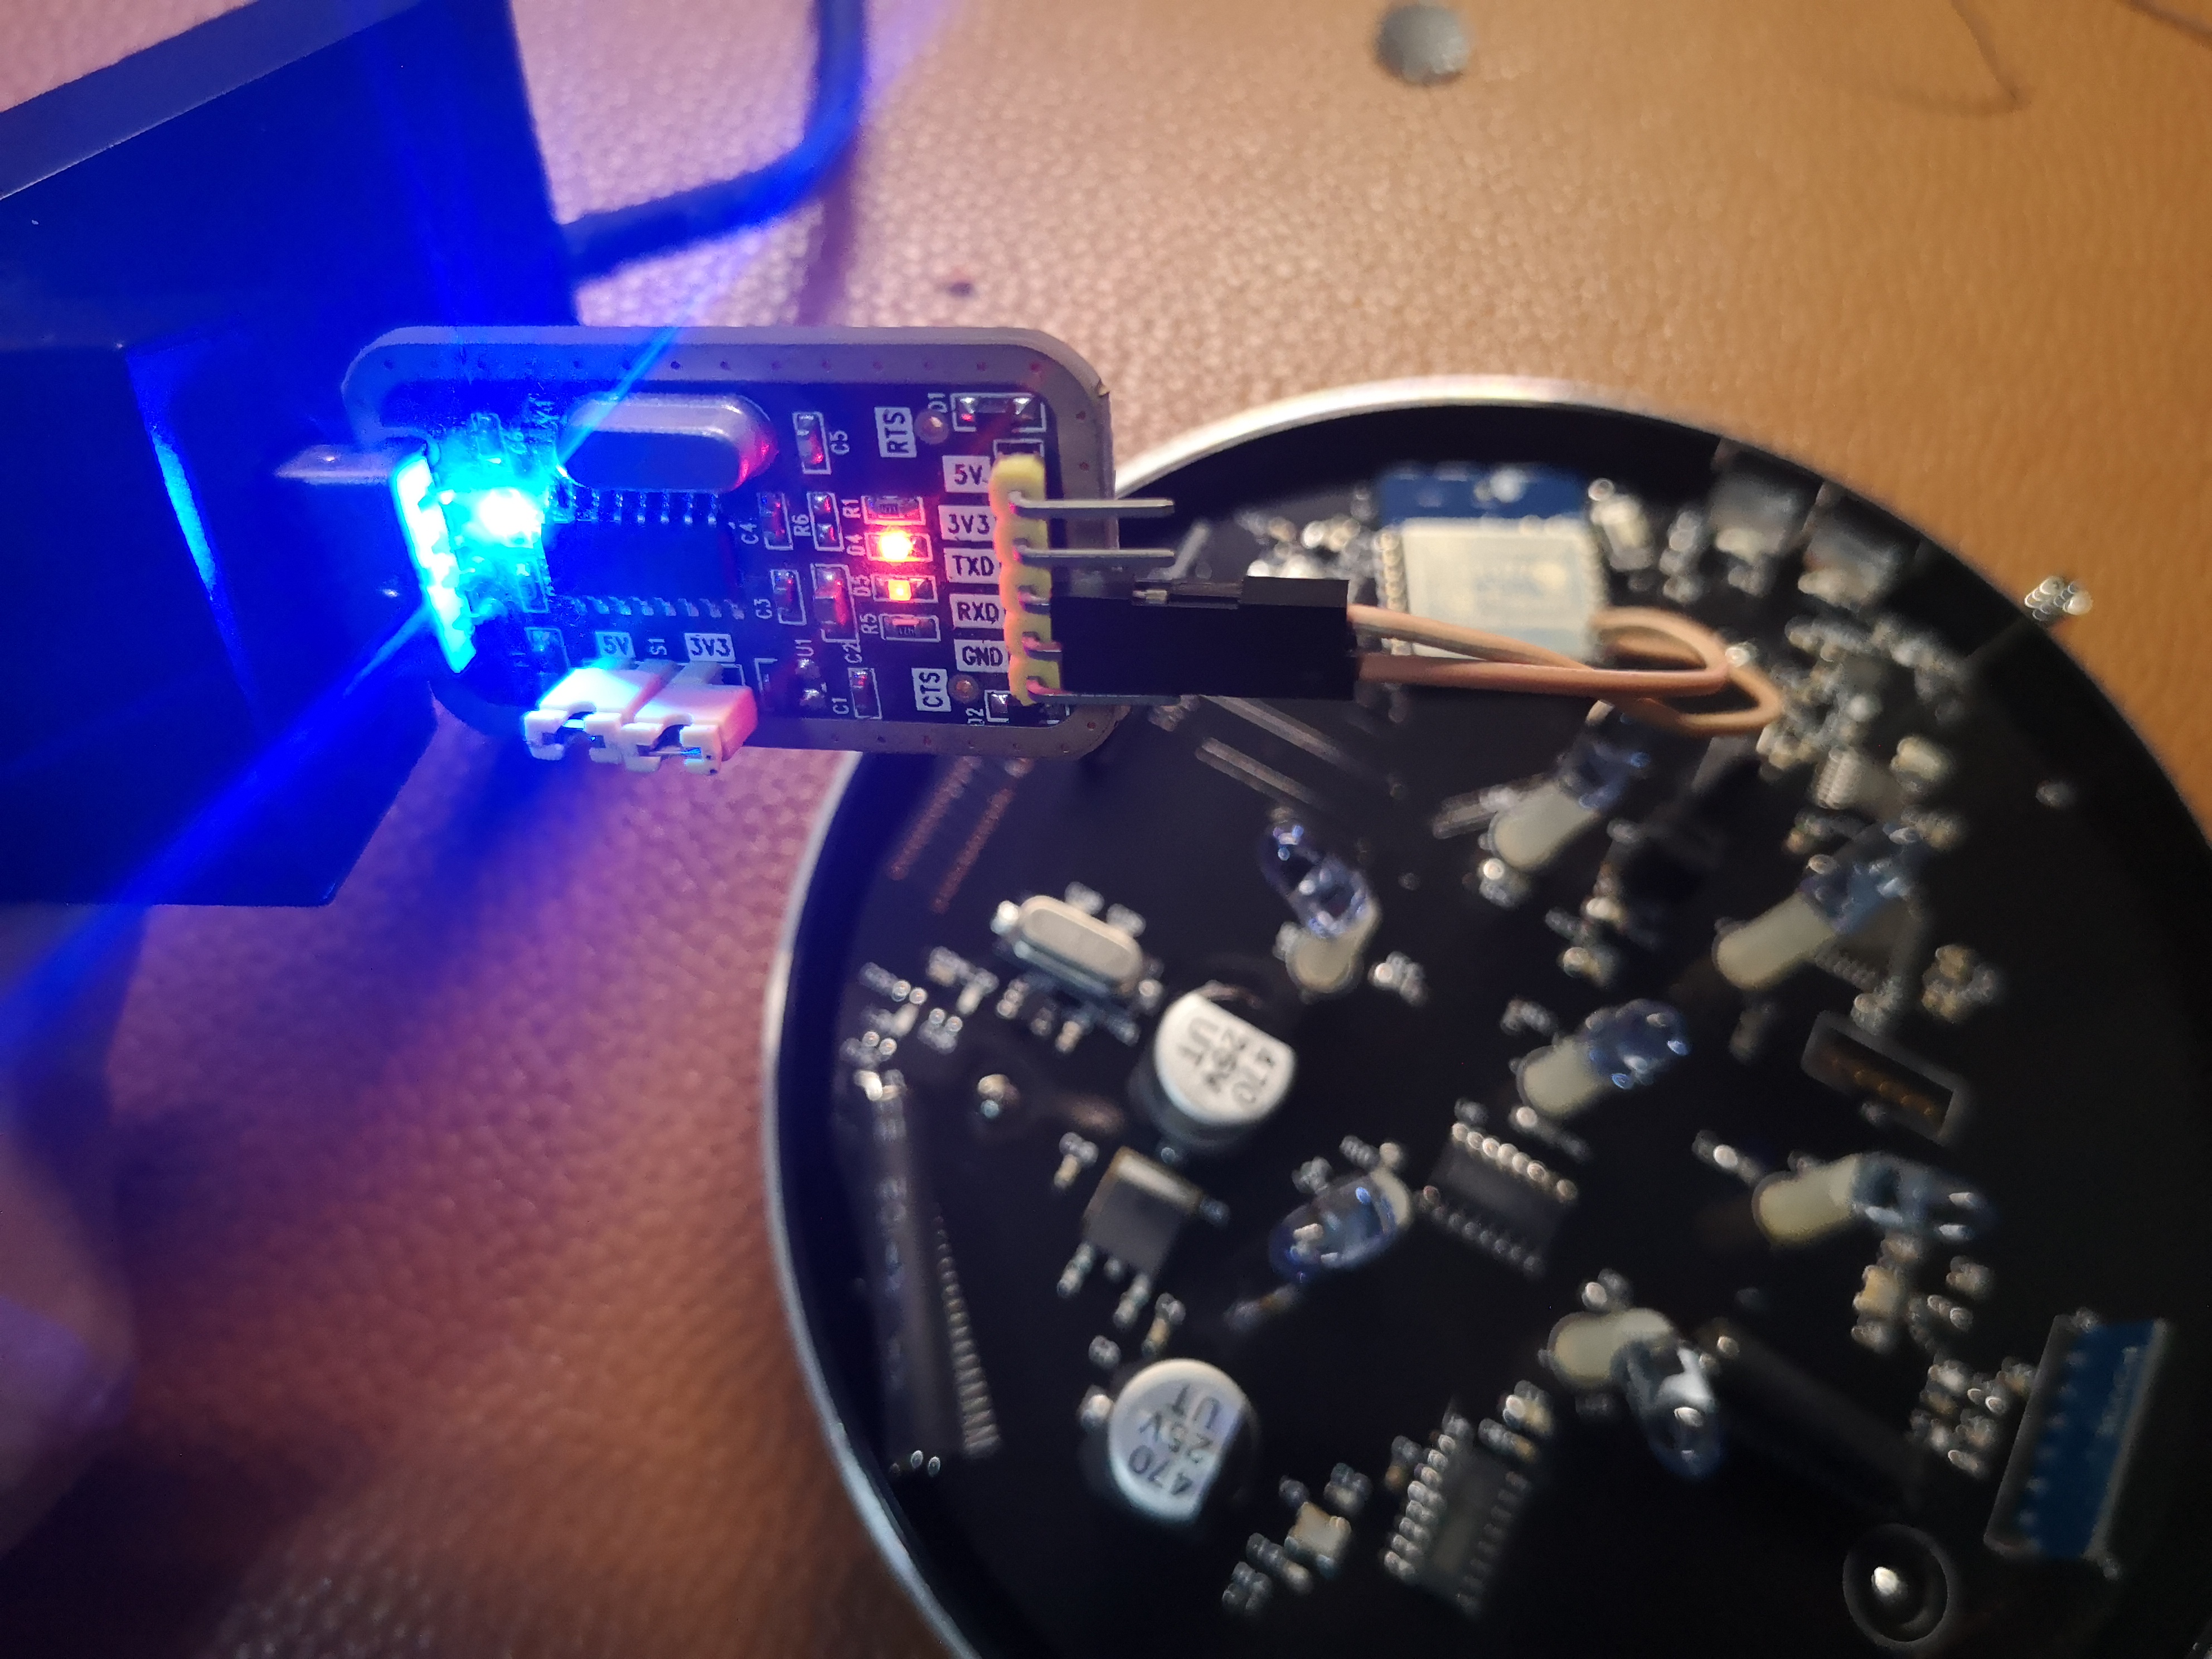
电路图为
# 安装基础版固件
这里使用官方提供的web页面进行安装。
- 将ESP8266的GPIO0下拉(接入GND)之后接通电源,此时板子进入固件更新模式
- 打开esp-web-tools (opens new window)页面
- 点击“CONNECT“按钮
- 选择已经连接到板子UART0的串口设备
- 根据页面提示进行操作
- 刷写成功后,在电脑上搜索“ESP Web Tools"的为WiFi并连接
- 打开浏览器,输入网关IP地址,进入ESPHome管理界面
- 输入可以连接上网的wifi名称与密码
# 安装ESPHome Dashboard
推荐使用docker进行安装,非常方面,指令如下:
docker run -d --rm --net=host -v "${PWD}":/config esphome/esphome
推荐新建文件夹之后运行上述命令,因为之后的配置都会保存在当前文件夹下。
docker创建成功之后在浏览器中输入“http://docker的IP:6052“即可等入管理页面
# 配置ESPHome
在登陆ESPHome Dashboard页面之后,如果之前的基础版固件成功运行并在一个局域网,主页将会显示:
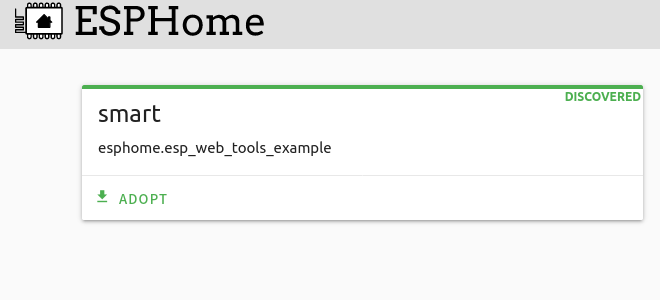
点击“ADOPT“,输入设备名称
点击“Install”之后并会再次OTA安装,可以点击取消
点击“Edit”按钮可以编辑yaml配置文件,可以参考官方的介绍 (opens new window)编辑,如希望添加IP信息输出则可以编辑yaml为:
substitutions:
  name: smart
packages:
  esphome.esp_web_tools_example: github://esphome/example-configs/esp-web-tools/esp8266.yaml@v1
esphome:
  name: ${name}
  name_add_mac_suffix: false


wifi:
  ssid: !secret wifi_ssid
  password: !secret wifi_password

status_led:
  pin: GPIO15

text_sensor:
  - platform: version
    name: "ESPHome Version"
  - platform: wifi_info
    ip_address:
      name: ESP IP Address
    ssid:
      name: ESP Connected SSID
    bssid:
      name: ESP Connected BSSID
    mac_address:
      name: ESP Mac Wifi Address
    scan_results:
      name: ESP Latest Scan Results
  - platform: template
    name: Uptime Human Readable
    id: uptime_human
    icon: mdi:clock-start
sensor:
  - platform: uptime
    name: Uptime Sensor
    id: uptime_sensor
    update_interval: 120s
    on_raw_value:
      then:
        - text_sensor.template.publish:
            id: uptime_human
            state: !lambda |-
              int seconds = round(id(uptime_sensor).raw_state);
              int days = seconds / (24 * 3600);
              seconds = seconds % (24 * 3600);
              int hours = seconds / 3600;
              seconds = seconds % 3600;
              int minutes = seconds /  60;
              seconds = seconds % 60;
              return (
                (days ? to_string(days) + "d " : "") +
                (hours ? to_string(hours) + "h " : "") +
                (minutes ? to_string(minutes) + "m " : "") +
                (to_string(seconds) + "s")
              ).c_str();
点击“INSTALL”在弹出页面选择"WIRELESS"安装(OTA)
等待安装完成后在主页面点击“Visit”,打开单板web页面,显示如下:
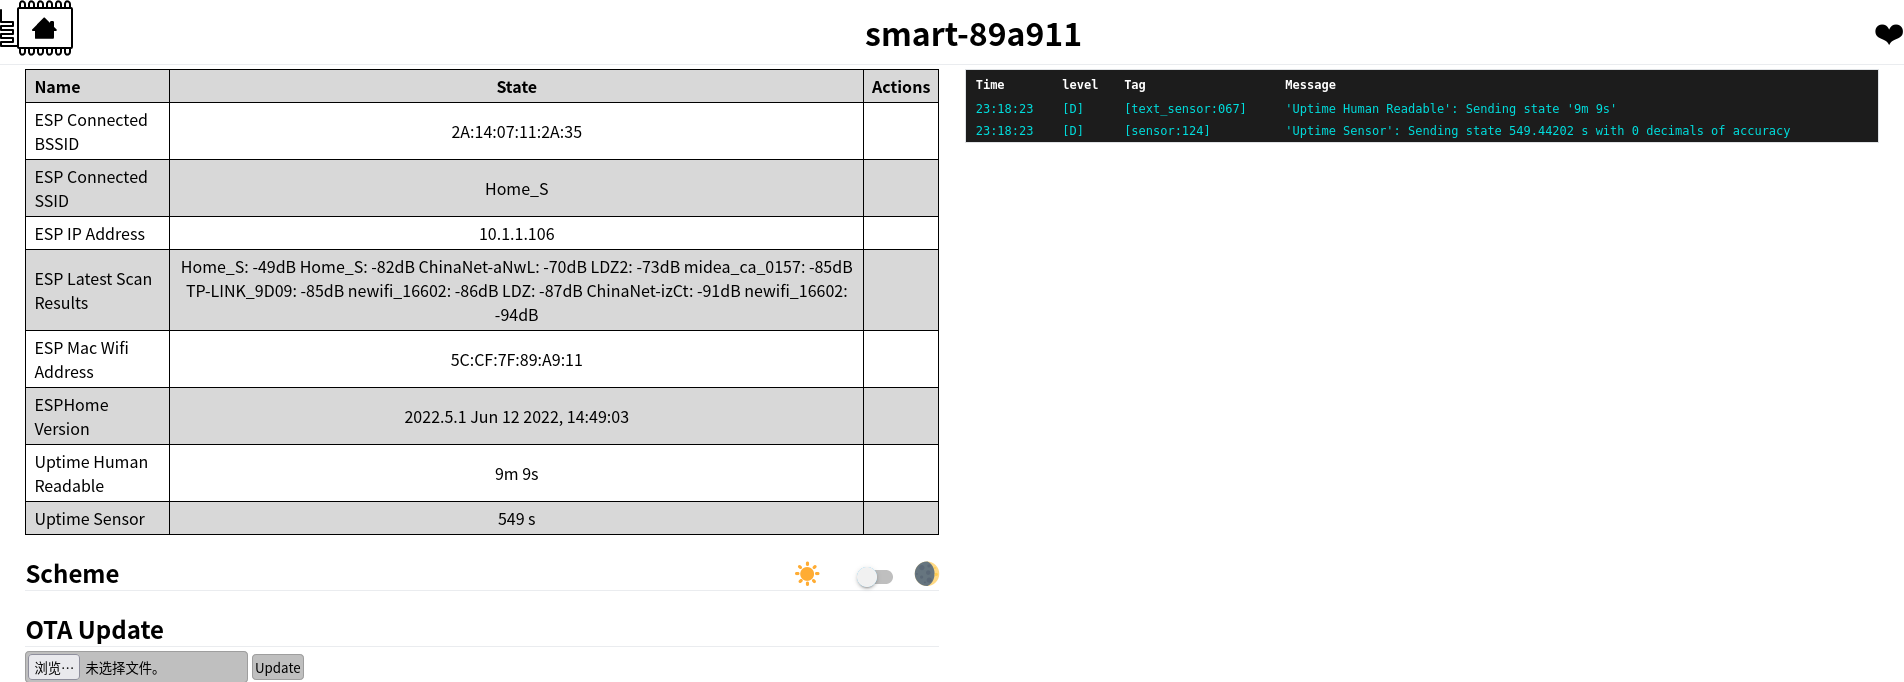
ESPHome 提供了很多组件,我的单板提供了IR收发的二极管,通过编辑yaml,从日志中读取原始红外码,之后添加button发射遥控信号,方法与上述类似,这里附上我的配置文件,其中控制电视用的是nec编码,控制灯用的是原始编码。
substitutions:
  name: "esp-iot01"
packages:
  esphome.esp_web_tools_example: github://esphome/example-configs/esp-web-tools/esp8266.yaml@v1
esphome:
  name: ${name}
  name_add_mac_suffix: false

wifi:
  ssid: !secret wifi_ssid
  password: !secret wifi_password

status_led:
  pin: GPIO15

remote_receiver:
  pin:
    number: GPIO12
    inverted: true
    mode:
      input: true
      pullup: true
  dump: raw

# Example configuration entry
remote_transmitter:
  pin: GPIO14
  carrier_duty_percent: 50%

# Individual switches
# switch:
#   - platform: template
#     name: "TV_ON/OFF"
#     turn_on_action:
#       remote_transmitter.transmit_nec:
#         address: 0xBF00
#         command: 0xF20D

button:
  - platform: template
    name: "TV Power Button"
    icon: "mdi:power-standby"
    on_press:
      - remote_transmitter.transmit_nec:
          address: 0xBF00
          command: 0xF20D

  - platform: template
    name: "TV Vol Down"
    icon: "mdi:volume-minus"
    on_press:
      - remote_transmitter.transmit_nec:
          address: 0xBF00
          command: 0xBC43

  - platform: template
    name: "TV Vol Up"
    icon: "mdi:volume-plus"
    on_press:
      - remote_transmitter.transmit_nec:
          address: 0xBF00
          command: 0xBB44

  - platform: template
    name: "Light Nor"
    icon: "mdi:ceiling-light"
    on_press:
      - remote_transmitter.transmit_raw:
          carrier_frequency: 38kHz
          code: [3551, -1652, 502, -369, 527, -344, 527, -1216, 527, -1215, 528, -344, 527, -1215, 527, -344, 552, -321, 526, -344, 527, -1215, 553, -319, 527, -346, 525, -1218, 525, -344, 528, -1214, 528, -344, 527, -1215, 552, -320, 552, -319, 528, -1218,
  524, -344, 527, -345, 551, -320, 552, -319, 527, -1216, 527, -344, 528, -1216, 526, -1215, 527, -344, 528, -1215, 554, -317, 552, -319, 553, -319, 527, -344, 552, -1190, 552, -321, 551, -319, 553, -1193, 550, -318, 552, -320, 527]

  - platform: template
    name: "Light Sun"
    icon: "mdi:ceiling-light-multiple"
    on_press:
      - remote_transmitter.transmit_raw:
          carrier_frequency: 38kHz
          code: [3529, -1674, 554, -316, 555, -317, 530, -1212, 556, -1187, 530, -341, 555, -1187, 553, -320, 529, -341, 555, -317, 555, -1188, 529, -342, 530, -341, 555, -1187, 555, -317, 554, -1188, 555, -317, 554, -1188, 554, -318, 554, -317, 530, -1213,
    530, -1212, 530, -1213, 554, -317, 554, -317, 531, -341, 555, -1188, 553, -318, 554, -1188, 555, -317, 554, -317, 554, -317, 531, -1212, 554, -1189, 554, -1188, 554, -318, 554, -316, 557, -1186, 530, -1213, 555, -316, 530, -1213, 555]

  - platform: template
    name: "Light Warn"
    icon: "mdi:ceiling-light-multiple-outline"
    on_press:
      - remote_transmitter.transmit_raw:
          carrier_frequency: 38kHz
          code: [3531, -1672, 506, -366, 530, -341, 530, -1212, 531, -1212, 530, -341, 531, -1212, 531, -341, 530, -340, 531, -341, 531, -1211, 531, -341, 530, -342, 530, -1212, 530, -341, 531, -1212, 530, -341, 535, -1208, 530, -341, 531, -340, 556, -1187,
  530, -1216, 527, -1211, 532, -341, 530, -341, 530, -1212, 531, -1212, 531, -341, 530, -1212, 530, -341, 556, -316, 530, -344, 553, -1186, 531, -341, 556, -1187, 530, -341, 533, -338, 531, -1212, 556, -1186, 532, -339, 532, -1211, 531]

  - platform: template
    name: "Light Night"
    icon: "mdi:ceiling-light-multiple-outline"
    on_press:
      - remote_transmitter.transmit_raw:
          carrier_frequency: 38kHz
          code: [3552, -1651, 552, -319, 528, -343, 528, -1214, 553, -1190, 531, -346, 522, -1217, 526, -343, 528, -344, 527, -344, 528, -1214, 553, -319, 528, -343, 528, -1214, 528, -344, 553, -1189, 528, -346, 526, -1214, 553, -319, 528, -344, 527, -1214,
      529, -343, 528, -343, 553, -319, 528, -343, 552, -320, 528, -1214, 528, -1214, 528, -1215, 552, -320, 527, -1214, 554, -318, 555, -317, 528, -1214, 528, -1218, 524, -1215, 553, -318, 528, -344, 528, -1214, 528, -343, 529, -343, 528]